
How To Renew Headlights
Are your headlights looking foggy, yellowed, or oxidized? Want to restore your car’s shine and improve visibility on the road? Look no further than our guide on how to renew headlights quickly and safely. This rewarding DIY project is easy to tackle with our expert tips and techniques.
In this article, we will provide you with a step-by-step process for fixing foggy headlights and making them look new again. But before we dive into the process, let’s first understand why headlights become dull and yellowed over time.
Key Takeaways:
- How to renew headlights and restore your car’s shine
- Understanding headlight oxidation and fading
- Preparing for headlight restoration with cleaning and sanding methods
- Step-by-step process for restoring headlights safely and effectively
- Maintaining headlights for long-lasting results
Understanding Headlight Lens Oxidation and Fading
Are your headlights foggy, yellow, or cloudy? If so, you’re not alone. Headlight oxidation is a common problem caused by prolonged exposure to UV rays, environmental factors, and poor maintenance. Over time, the surface of your headlights can become cloudy and yellow, affecting the performance and appearance of your car.
Headlight oxidation is easy to identify. If your headlights appear cloudy, yellow, or dull, it’s a clear sign that they are oxidizing. In addition to hindering visibility while driving, faded headlights can give your car a worn-out look.
The causes of headlight oxidation are numerous. Sun exposure is one of the primary culprits, as UV rays break down the protective coating on the plastic surface. Environmental factors such as pollution, salt, and debris can also contribute to headlight deterioration. Poor maintenance can compound the problem further. Failing to wash your car regularly or replacing worn-out headlights in a timely manner can exacerbate existing oxidation.
If left unchecked, headlight oxidation can become a safety hazard. It’s essential to address the issue promptly to ensure visibility on the road and improve the overall appearance of your vehicle.
How Headlight Oxidation Occurs
| Cause | Effect |
|---|---|
| UV Exposure | Breaks down protective coating |
| Environmental Factors | Contribute to headlight deterioration |
| Poor Maintenance | Exacerbates existing oxidation |
Now that you understand the causes and effects of headlight oxidation, you’re ready to start the restoration process. Continue reading to learn how to prepare for headlight restoration.
Preparing for Car Headlight Restoration
Before you begin the headlight restoration process, it’s crucial to prepare your headlights adequately. This section will provide you with all the essential steps to ensure a successful DIY headlight restoration. Let’s get started!
Ways to Clean Foggy Headlights
The first step in preparing your headlights is the need to clean any dirt or grime on the surface. You can use a variety of cleaning methods to achieve this, including:
- Soap and water
- Baking soda and water
- Automotive cleaning products
Polish your dulling headlights using a clean microfiber towel, apply your chosen cleaning agent to the headlights, and scrub the surface gently. Rinse with water and dry thoroughly before moving on to the next step.
DIY Headlight Restoration Supplies
Now that your headlights are clean, it’s time to gather the necessary supplies for the restoration process:
| Supplies | Details |
|---|---|
| Sandpaper | Various grits (400, 1000, 2000, and so on) |
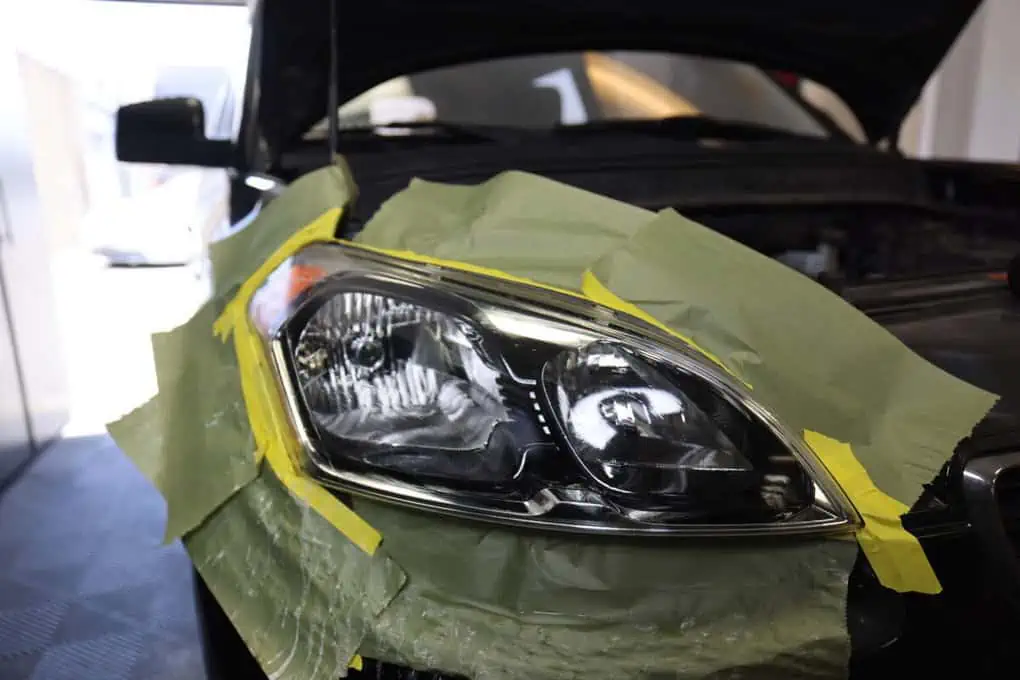
| Masking tape | To protect the car’s paint |
| Polishing compound | For removing scratches and haze |
| UV sealant | To protect the headlights from future damage |
| Toothpaste or Baking soda | For removing residue from the headlights |
| Spray bottle | Filled with water to wet the sandpaper as you work |
Wash Your Car
Before starting the restoration process, it’s also important to wash your car thoroughly. This will remove any dust or debris that could potentially scratch the car’s surface during the restoration process. Use a high-quality car wash solution and a microfiber cloth to ensure a thorough cleaning.
By following these essential preparation steps, you’ll be ready to move on to the next stage of the headlight restoration process. Don’t skip these steps – they’re crucial for achieving a satisfying result!
How to Renew Headlights Permanently Step-by-Step
Now that you’ve prepared your headlights for restoration, it’s time to dive into the process. Follow these step-by-step instructions to restore your headlights permanently:
- For best results start by applying a polishing compound to your headlights. Use a microfiber cloth or buffer to apply the compound in circular motions. This will remove any surface-level buildup and help to restore clarity to your headlights.
- Next, use grit sandpaper (around 1000 grit) to sand down any remaining imperfections on your lens surface. Use a spray bottle filled with water to keep the surface wet while sanding. Keep using the sandpaper until you’re satisfied with the smoothness of the surface.
- If your headlights are made of plastic, they may require some special attention. Use a plastic headlight cleaner and a microfiber cloth to remove any discoloration or haziness.
- After sanding, use a clean microfiber cloth to wipe away any residue. Then, apply a UV sealant to protect your headlights from future damage and to improve their lifespan. Allow the sealant to dry according to the manufacturer’s instructions.
- Finally, wipe down your headlights again using a clean, dry microfiber cloth. This will remove any excess sealant or other residues, leaving you with a perfectly clear and shiny set of headlights.
By following these steps, you can restore your headlights to their former glory. Plus, you can do it all from the comfort of your own home, saving you time and money on professional restoration services.
Maintaining Headlights for Long-Lasting Results
Congratulations! Your headlights are renewed and look like new. Now, it’s important to take proper care of them to ensure long-lasting results. Here are some headlight care and maintenance tips:
UV Protection
One of the primary causes of headlight oxidation is prolonged exposure to UV rays from the sun. To prevent this, consider applying a UV protection film to your headlights. This will not only protect them from the sun but also from harmful environmental factors.
Cleaning Hacks
To keep your headlights looking their best, it’s crucial to clean them regularly. Use a microfiber cloth and a mild soap solution to wipe down your headlights. Avoid using harsh chemicals as they can damage the protective coating on the headlights. You can also try using household items such as vinegar, baking soda, or toothpaste to remove stains and grime.
Tips on How to Renew Headlights
If you notice your headlights starting to look foggy again, don’t panic! There are several methods to renew dirty headlights at home that you can use to keep them looking like new. For instance, try using a polishing compound or sandpaper to remove any cloudiness. You can also consider applying an acrylic or ceramic coating that provides additional protection against UV rays and other environmental factors.
Removing Haze from Headlights
If your headlights are becoming hazy again, it’s likely due to dirt and debris buildup. Wipe the headlights to remove the haze. Use a mild soap solution and a clean microfiber cloth. For tougher stains, try using a specialized headlight cleaner. Avoid using abrasive materials or rough towels that can scratch the surface of the headlight lens.
Keeping your headlights in good condition is essential for visibility on the road. By following these headlight care and maintenance tips, you can extend the lifespan of your auto headlights permanently and keep them shining bright for years to come.
Conclusion
We hope you enjoyed the headlight renewal step-by-step article! By following our instructions, you can now enjoy bright and shiny headlights on your car that will enhance its appearance and functionality. Remember to regularly clean and polish your car’s headlights by using the methods we have provided. This will ensure that they stay in tip-top condition.
Headlight renewal is a cost-effective and straightforward DIY project that can save you money on replacements and improve your driving experience. Don’t let cloudy headlights compromise your safety on the road. Instead, refer back to this article to renew your headlights and restore your car’s shine.
Thank you for choosing us as your go-to source for headlight renewal tips and tricks. We hope you enjoyed your read and found it helpful in making your headlights look new again. If you have any questions or feedback, feel free to reach out to us. We would love to hear from you!
FAQ
What causes foggy headlights?
Headlights can become foggy or yellowed due to prolonged exposure to UV rays, environmental conditions, and lack of proper car maintenance.
How can I clean foggy and yellowed headlights before starting the restoration process?
You can clean foggy headlights by using methods such as sandpaper, toothpaste, baking soda, and a spray bottle. Make sure to wash your car thoroughly as well.
What are the steps to clean plastic lenses?
The way to restore headlights includes using a polishing compound, sandpaper, tackling plastic headlights, and applying a UV sealant. Proper wiping and polishing techniques are also important.
How can I keep my headlights clean?
To maintain the appearance of your headlights, it’s important to implement headlight care and maintenance practices. This includes UV protection methods, cleaning hacks, and regular maintenance to remove haze if it reappears.
Is headlight renewal a difficult DIY project?
Headlight renewal can be a rewarding DIY project with our step-by-step guide and the right methods. By following our instructions and maintaining your headlights, you can achieve professional results quickly and safely.